Understanding the Report Workspace
When setting up a new report, or when adding another layout to an existing report, you will need to design a report layout to view the results.
Report design in eTAM XTC is as simple as dragging and dropping various elements from the layout assets into the report grid as required.
Information can be nested above, below or beside other elements to breakout information. Many options than can be dragged into the layout have their own setting that can be either accessed on a right click in the layout assets and/or the report grid and some can be accessed via the settings button in the toolbar.
Report Areas
A number of different zones will be referred to in Report design. An overview of these zones are shown as follows:
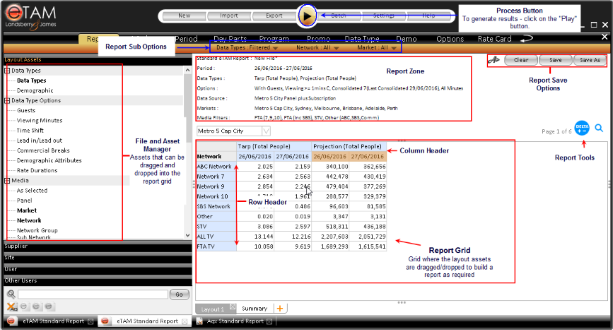
Image Title
Layout Assets
Area to the left of the screen that lists all the items that can be dragged into the report grid.
Report Grid
The grid in the middle of the screen that items are dragged and dropped into when designing your report layout. The report grid consists of columns and rows whereby selections from the layout assets maybe dropped onto the blue shaded column and row headers, depending on how you want your report to look.
Report Page Header
Located above the report grid. Items dragged into the page here will set-up different pages of the report.
Report Save Zone
Located top right of the report of the report tab. The report save zone allows you to clear the current layout, save the report or create a copy or opt to save the report without certain report elements via the "Advance options".
Report Layout Tabs
You can have a number of report layouts within the one workspace. You can build multiple reports using the same selections to view results in various layouts.
Report Zone
Lists information such as report name, period range, data types etc. You can also drop layout asset items into the report zone, this will allow you to use the sub - options bar to filter results displayed on your report grid.
See Also